
Before you start the process of installing a walk-in tub it’s important to understand the process and timeframe that will happen to make a walk-in tub a reality for you.

Determine Your Needs
Removing the Old Tub
Before the installation of your new walk-in tub can take place, your old tub must be removed. This is generally done by cutting it out of the space and open the walls to the top of where the new unit will go. This will expose the studs to give the installer the ability to install the new tub properly and safely. If surrounding panels are to be installed, the walls will need to be taken out to expose the studs to just above the top of the panel. After removing the old tub, measure to ensure you don’t need to temporarily remove the fixtures to get the new tub in. In most cases, you won’t need to, but it’s important to double check before bringing the new tub into the space.
Prepare for Installation of New Tub
Now that the space is prepped for the installation of the new tub, there are a few things that need to be done to prepare the walls for installation of the tub. To install the ledger board, the representative will figure out where the top of the tub will be and install a 2×4 piece of lumber all the way around where the top of the tub will go. This can be secured with nails or dry wall screws to hold it securely in place. This ledge will support the tub edges.

Install Drain Lines & Mortar
Next, they will install the drain lines and overflow from the old tub onto the new walk-in tub. This can be done by laying the new tub on its side and lining up the lines. If there is a shortage or overage, they can add or remove pipes to ensure a proper fit. In most cases, the old shoe fitting should fit the new tub as they are standard in size. Plumber’s putty will be used on the connections to ensure there is no leaking.
Next, a 2-inch thick layer of mortar will be smoothed out on the subfloor where the tub will sit.
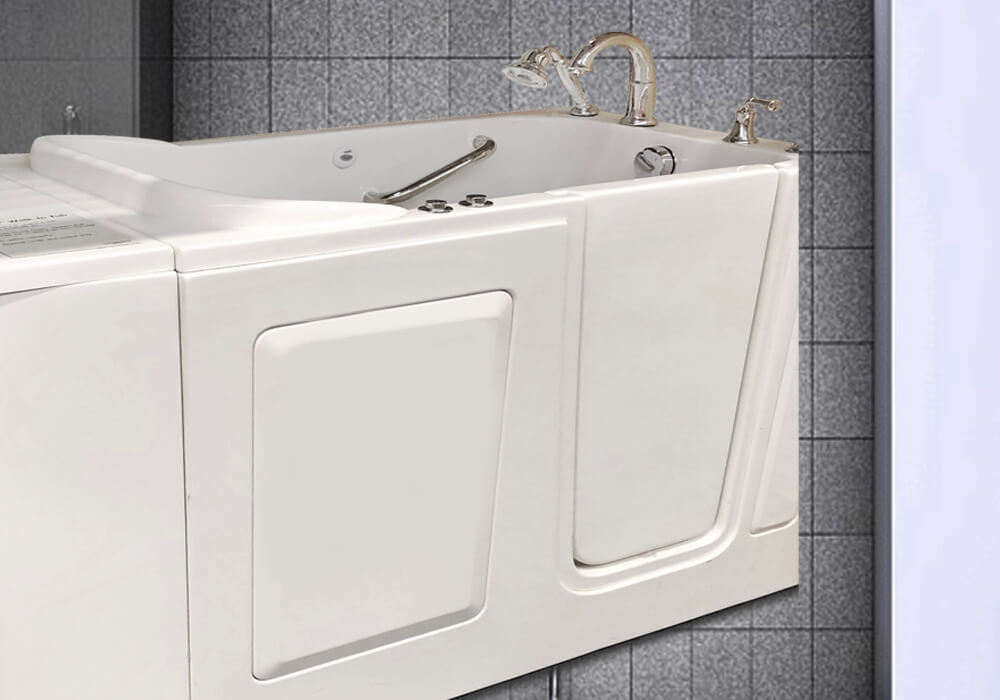
Install the New Tub
Now the tub is ready to be placed in the space. This is generally done with two people, so they can lift and set the tub down to avoid damage to the tub or bathroom. The shoe fitting lines will be carefully lined up and the tub should be lined up with the ledges that were installed along the top of the tub. Any mortar visible along the edges of the tub will be cleaned up. Next, the tub will be leveled and secured into place. This will be done with the use of shims and levels until the tub is level. Once level, it will be secured using galvanized nails through the flanges into the ledges.
Once the tub has been nailed into place it’s time to install the drain and faucets. This can be done with the shoe fittings through the adjacent wall or the hole in the ceiling underneath if a second story bathroom. Next, the faucets will be installed back in place where they came from. With the installation complete the water line can be turned back on and everything tested to ensure it works properly and nothing leaks.
If there is ever a problem with the tub after installation, contact the company immediately for it to be repaired.
When choosing a walk-in tub company it’s good to make sure they offer a great warranty to help cover problems that may arise.